Here is an awesome site that allows for the creating, writing, and publishing of a story that either you as a teacher or your students can write. If you teach a subject where at some point your students need to create a short story, or a children's story then this site is for you. It is called www.myebook.com.
What you can do?


3. Sign in with the username and password you just created and the click the "Log in" button.

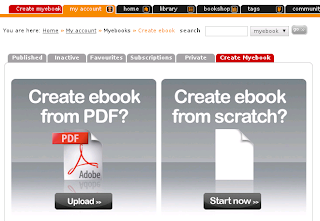
4. Click on the "Create mybook" tab to get started. Then select whether or not to start from scratch or upload a book you have already been working on if it is in the PDF format.

5. In this tutorial we will be creating a new one, so select the "Start now" button under "Create Ebook from Scratch." Now add your title, tags (these are used to make your book more searchable), select the category, and then decide how many pages you need. You can always add or subtract pages later. Now hit the "Next step" button.

6. You can use some of their themes, but I prefer starting off with a blank one.Click the "Next Step" button.

7. You should now see the front cover of your book and you can start creating your book now. Move to the next page using the "Arrow button" or selecting the pages option at the very bottom of the screen.

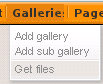
8. Lets get some pictures. Click the "Gallerie" button at the top and then select the "Get Files" option.
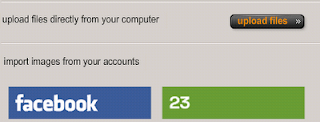
9. Click on the "Upload files" button. You can also get them from other apps on the internet such as facebook.
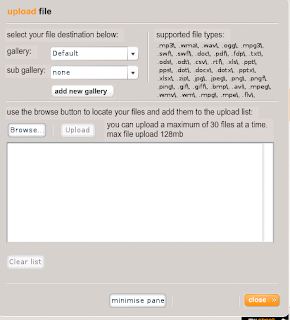
10. Click the "Browse" button and locate your files. After you select the files you want to upload click the "upload" button.
11. After they are uploaded you can click on the "images" tab found at the very bottom of your screen. Click on the "subgallery" if you created one, in this case I am going to click on the "Default" option. This will now display my pictures. Just left click and hold on a picture that you want to use and then drag it to your page.
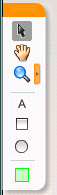
12. Add text by click on the "A" found on the action bar to the left. Move your mouse to your page and drag a box.
13. Click inside the text box and then another action box opens up on the right hand side of the screen. Use this box to change the font, size, color and a bunch of other things.

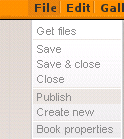
14. Like all programs you just need to play around with the different options to find out what everything does. Once you are done with your book and you are ready to publish it so others can see, click on the "File" option at the top and select "Publish."
15. Just select the options you want for your book and then click the "Publish now" button. You now have an officially published ebook that can now be shared with the world.

15. To share it with the world go back to the website www.myebook.com and make sure you are logged in. Select the "My account" tab at the top and then the "Published" tab. You should now see your published book.
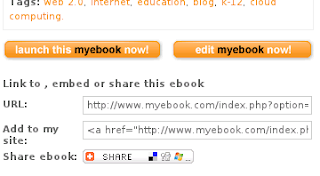
16. Click on your published book and then you will see the "launch this myebook now" and the "edit myebook now" buttons. If you want to see what your book looks like click the "launch this myebook now" button. Below those buttons are the web address to your book and the embed code. Do what you would like with them so that others can see your book. Below is an example of the link and embedded books.
My not finished tutorial book: http://www.myebook.com/index.php?option=ebook&id=105458
My embeded book. (This is not a true embed, it is basically the picture of your cover with a link to the book on the web.)

What you can do?
- write a story
- add pictures to the story
- link to your story on your blog or website
- have your students comment on the story
- share your story with others
- for the ambitious students they can try and sell their story
- create a pdf of your story
- add sound and video to your story (even though I haven't had simple luck with the video part yet.)
- read what other people wrote and there are plenty of children stories on the site that your students might enjoy reading.
What are some drawback of using the site?
- I found it a little slow with linux computers and better with Windows.
- I had trouble adding a youtube video.
- You have to register a free account.
How do you use it?
1. Register by clicking on the "Sign Up" link in the top right corner of your screen.
2. Fill in all the required information. Make sure you click the "check box" at the very bottom and then click the "Register" button.

3. Sign in with the username and password you just created and the click the "Log in" button.

4. Click on the "Create mybook" tab to get started. Then select whether or not to start from scratch or upload a book you have already been working on if it is in the PDF format.

5. In this tutorial we will be creating a new one, so select the "Start now" button under "Create Ebook from Scratch." Now add your title, tags (these are used to make your book more searchable), select the category, and then decide how many pages you need. You can always add or subtract pages later. Now hit the "Next step" button.

6. You can use some of their themes, but I prefer starting off with a blank one.Click the "Next Step" button.
7. You should now see the front cover of your book and you can start creating your book now. Move to the next page using the "Arrow button" or selecting the pages option at the very bottom of the screen.

8. Lets get some pictures. Click the "Gallerie" button at the top and then select the "Get Files" option.
9. Click on the "Upload files" button. You can also get them from other apps on the internet such as facebook.

10. Click the "Browse" button and locate your files. After you select the files you want to upload click the "upload" button.

11. After they are uploaded you can click on the "images" tab found at the very bottom of your screen. Click on the "subgallery" if you created one, in this case I am going to click on the "Default" option. This will now display my pictures. Just left click and hold on a picture that you want to use and then drag it to your page.

12. Add text by click on the "A" found on the action bar to the left. Move your mouse to your page and drag a box.
13. Click inside the text box and then another action box opens up on the right hand side of the screen. Use this box to change the font, size, color and a bunch of other things.

14. Like all programs you just need to play around with the different options to find out what everything does. Once you are done with your book and you are ready to publish it so others can see, click on the "File" option at the top and select "Publish."
15. Just select the options you want for your book and then click the "Publish now" button. You now have an officially published ebook that can now be shared with the world.

15. To share it with the world go back to the website www.myebook.com and make sure you are logged in. Select the "My account" tab at the top and then the "Published" tab. You should now see your published book.
16. Click on your published book and then you will see the "launch this myebook now" and the "edit myebook now" buttons. If you want to see what your book looks like click the "launch this myebook now" button. Below those buttons are the web address to your book and the embed code. Do what you would like with them so that others can see your book. Below is an example of the link and embedded books.

My not finished tutorial book: http://www.myebook.com/index.php?option=ebook&id=105458
My embeded book. (This is not a true embed, it is basically the picture of your cover with a link to the book on the web.)
No comments:
Post a Comment